The Oil Cleansing Method 101
Published on February 12, 2014 by Dr. Caitlin Gordon
What is it?
Using high quality organic or cold-pressed oils as a cleanser and moisturizer in one, instead of commercial face wash and/or toner, moisturizer, etc.
How do you do it?
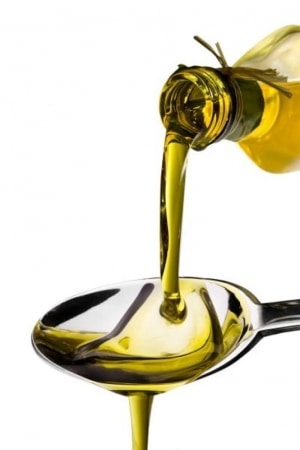 Wash your hands. Apply your oil mixture to your face with your fingers and massage for 1-2 minutes really working it in. This alone is so amazing for your face: massage helps boost blood flow, improving cell turnover, which means better tone, fewer wrinkles, tighter skin. No need to remove your makeup or anything first. Let it sit there for 30 seconds or so. Relax. Smile at yourself. Brush your teeth. Whatever. Get the sink water hot and dip a wash cloth in the water. Place the cloth over your face and allow it to steam* for a few seconds and then gently wipe away the oil. Rinse washcloth in hot water and repeat until all the oil is off your face. You’re done. If you are breaking out, you can dab some diluted tea tree oil on blemishes. If you want to treat fine lines, I use a little rosehip seed oil on Otherwise, no need to apply any other product to your face.
Other sources say not to wet your face first, to apply oil and massage for 1-2 minutes, then to steam face with a hot washcloth for 1 minute, repeat 1-2 times. Use corners to gently wipe away any oily spots but leave a thin layer of oil.
Try both methods to see what works best for your skin. If you’re super dry, rub in an extra drop of oil at the end as your moisturizer.
If all this looks too involved: apply oil, rub it around, wipe it off.
*Some people with very sensitive skin may experience broken capillaries on the surface of the skin from hot water and steaming. I am prone to this, and so I alternate using hot water and just warm water without the steam factor. I think that sun damage, environmental damage, thinning skin from harsh commercial products, and picking at blemishes has caused 90% of the broken capillaries on my face, but it is possible that hot steam will do this too.
What kind of results should I expect?
Every type of skin is different, and this will not work best for everyone. But, I love it. Expect your skin to glow–really! Your skin should feel much softer within a couple of days using this method. You may break out a little more at first if you’re prone to breakouts**. I’ve heard it can take from 1 week to a couple months to pull all of the impurities out of your skin before it starts to clear up. For me, it only took 3 days to notice my skin clearing. Your skin should self-regulate and lead to fewer breakouts in the future. Fine lines will start to diminish. Your skin tone will even. People will ask if you’re pregnant, or in love… haha okay, that was a joke, but you’re gonna have that dewy look about you! It also helps your eyebrows and eyelashes grow faster, thicker, and stronger… Disney princess lashes coming right up!
For more reasons to oil cleanse, read: 5 Reasons To Try Oil Cleansing
**A note about oil cleansing for acne: Acne is a very complicated issue. You cannot resolve most acne with a change in face-washing alone. Acne is the skin’s way of trying to detox. This means something internally is out of balance. Dietary changes and acupuncture are very effective at helping to control and reduce acne. Hormones and intestinal health play a huge role here, so I do not want to imply that the oil cleansing method is a magical solution.
 What oil should I use?
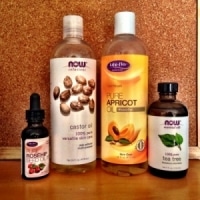
The most often recommended combo is ½, ¼, or ⅓ castor oil mixed with another oil: either apricot kernel, avocado, jojoba, or even olive oil. Depending on your skin type, you will need a different ratio. Castor oil is actually quite drying. So if you have drier skin naturally, you will want to use a smaller ratio of castor oil. If your skin is very oily, you might go with ½ castor oil. Jojoba is great for breakout prone skin, and apricot kernel and avocado tend to be neutral or better for drier skin. You will need to play around and see what works for you.
Currently, I am using ½ castor oil and ½ apricot kernel oil. I ordered both off amazon.com, for pretty dang cheap. I add 100% pure lavender essential oil which makes the mixture smell heavenly and adds to the calming properties (reduces redness and irritation). I also use rosehip seed oil or my favorite Blissoma Restore Oil as an antiaging treatment around my eyes and on my neck. This can cause breakouts on sensitive areas, so I do not use it on my forehead. Read about the benefits here: Rosehip seed oil
Life-Flo Pure Apricot Oil, 16 oz for $11.16
Now Solutions Castor Oil, 16 oz for $6.79
and Now Foods Tea Tree Oil, 4 oz for $17.97 for when I need to treat a breakout.
This is enough to last me several months. I also ordered a glass bottle to mix them into and keep them in next to the sink, along with some organic cotton washcloths. FYI, you’re going to go through a lot of washcloths. You need to wash them after 1 or 2 uses to make sure no bad bacteria accumulates there. It’s probably best to wash them with other towels, in case any oil gets out and on to the other things in the wash. A little dash of baking soda in the washer helps pull the oil out, but I find my regular eco-friendly laundry detergent does the trick.
“So this all sounds great, but I’m not really the DIY type”:
Me either! But, what I have found is that I’m never that type until I try something and realize how little time it actuality takes, and then I’m hooked. I can be lazy. Really, I am all about convenience. This sounds like a lot of steps, right? It takes about 5 minutes to place your order online or pick up oil next time you’re at your natural grocery store. Then, 2 minutes to mix the oil together in a bottle and place next to your sink. The washing process itself takes maybe 1 minute longer than using a normal cleanser, but if you’re someone who uses a Clarisonic or similar battery operated brush device, then it’s really no more time at all. By the way, you can use those with this oil method. I do about twice a week, and no issues yet. Buy enough washcloths that you can go a week or 10 days or however long it is you normally wash your towels, and just throw them in with the rest. Voila, not really more work at all.
Other ways to use your oils:
Use oil on your body, after you get out of the shower. Apricot oil is a wonderful all over body moisturizer. The climate in Colorado is very dry, and in the winter with the heat going it can seem like a losing battle trying to avoid rough elbows and flaking skin. Dry brushing, and using oil on moist skin after the shower keeps me silky smooth.
Need to exfoliate? Add some brown sugar or turbinado sugar (for larger granules, and a rougher scrub), into your lighter oil and rub on your face or body. Add some lemon for a little natural fruit acid which dissolves dead skin cells. Set aside 10 minutes one afternoon to whip up a batch and then you can keep it in your bathroom. Brown sugar and oil won’t go bad very quickly–1 to 2 weeks in a lidded container is safe without needing to worry about harmful bacteria growing in there. You can add a squirt of lemon juice while you’re making your morning juice and exfoliate after breakfast. Don’t pretend that didn’t sound like a great plan.
The contents of this site, including text, graphics, images, and other material are for informational purposes only. Nothing contained in this site is or should be considered or used as a substitute for professional medical or mental health advice, diagnosis, or treatment. Please schedule an appointment for personalized health advice.

